Money where it matters
Helping you grow, save, and achieve your goals.

Numerica will be closed Friday, July 4, in observance of Independence Day.
Get our mobile banking app:


This step-by-step guide is intended specifically for business members. (For general tips and tricks, check out the Online Banking how-to guide.)
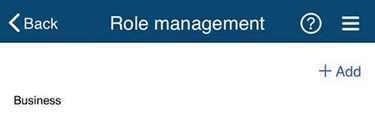
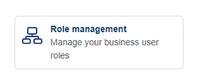
Log in and select the hamburger menu (3 lines in the top right). Select Role management.

To the far right, select +Add.
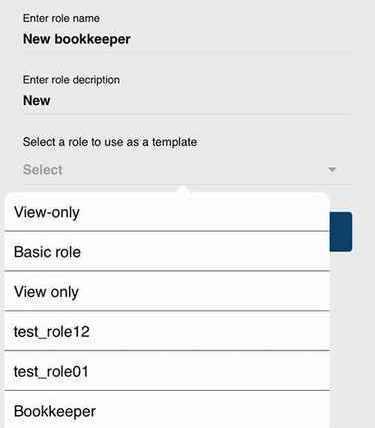
Enter a role name and description. Then select a template. Tap Next. Example role names: admin, bookkeeper, accountant, John Smith. Example role descriptions: view only, full access, limited access.
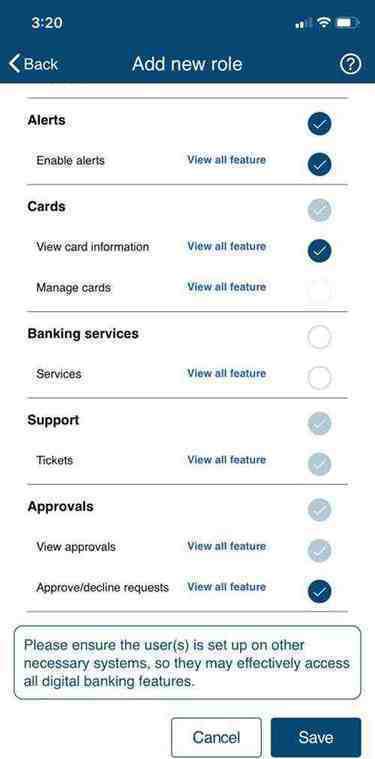
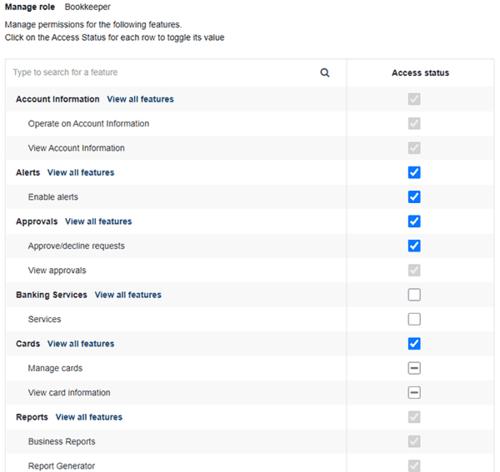
Set role privileges and tap Save.
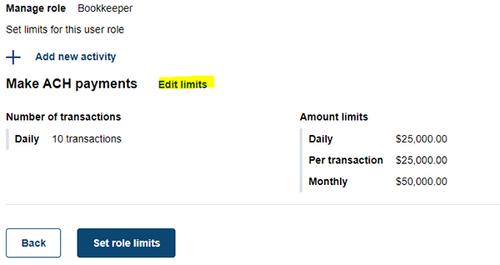
Set role limits and tap Save.
Note: Limits are set for the role level, not user level. You can return to adjust the privileges and limits of a role at any time by selecting it from the Role management screen.

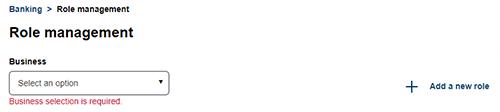
Log in and select More.

Select Role management.
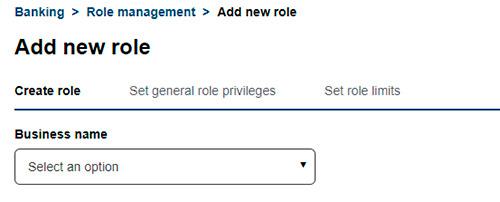
To the far right, select +Add a new role. Note that if you have more than one account linked, you will need to select a business from the dropdown.
On the next screen, you will again need to select a Business name from the dropdown, if you have multiple accounts linked.
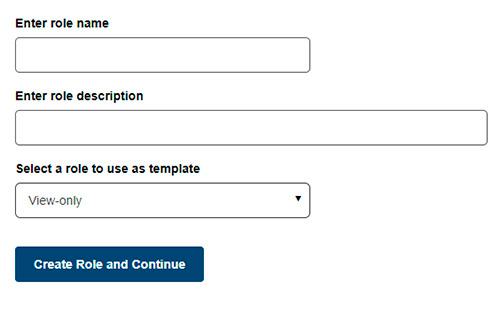
Enter a role name and description. Select a template. Click Create Role and Continue. Example role names: admin, bookkeeper, accountant, John Smith. Example role descriptions: view only, full access, limited access.
Set role privileges and click Save and proceed.
Set and save role limits.
Note: Limits are set for the role level, not user level. You can return to adjust the privileges and limits of a role at any time by selecting it from the Role management screen.
Note: An authorized user (also called a sub-user) is someone given authority by the account’s primary online user to perform certain digital banking functions on behalf of a business — but using a separate login with limited permissions. This does not give a person access to the account in a Numerica branch or over the phone. This role is distinct from an authorized signer. An authorized signer has access to the account in a Numerica branch, over the phone, and through digital channels. An authorized signer cannot be added to an account through digital banking.
A new user can only be added to one business at a time. If you have multiple businesses you want the user to have access to, repeat the process for each additional business.
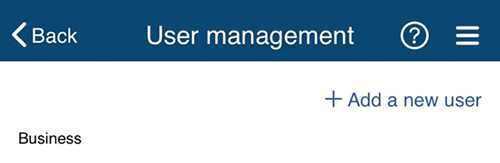
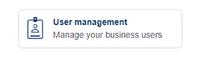
Log in and select the hamburger menu (3 lines in the top right). Select User management.
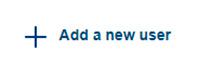
To the far right, select +Add a new user.
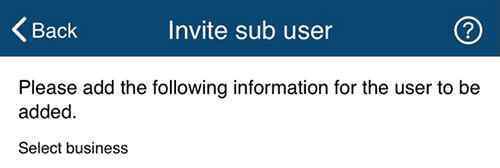
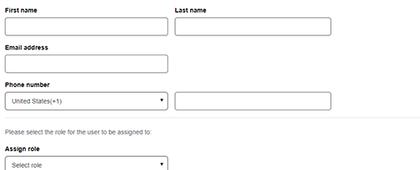
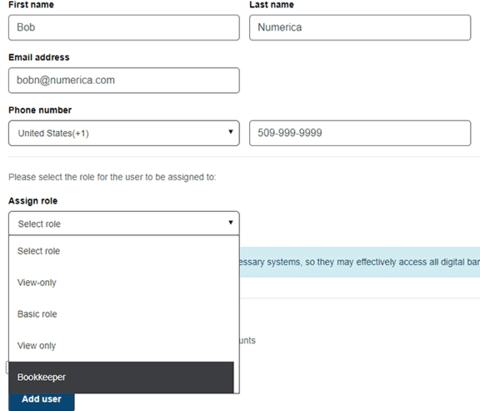
Select Business and enter the user's information.
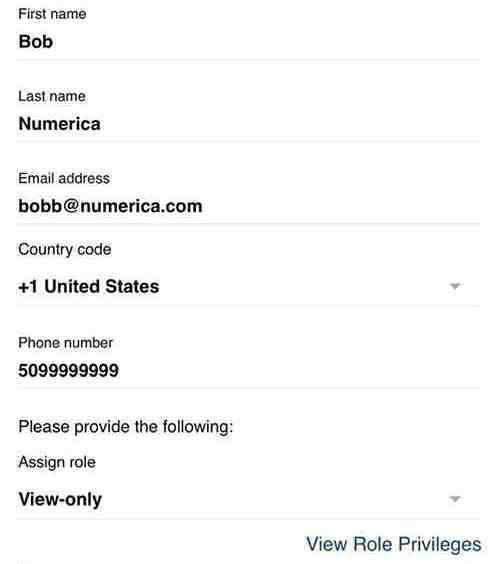
Assign a role to the user.
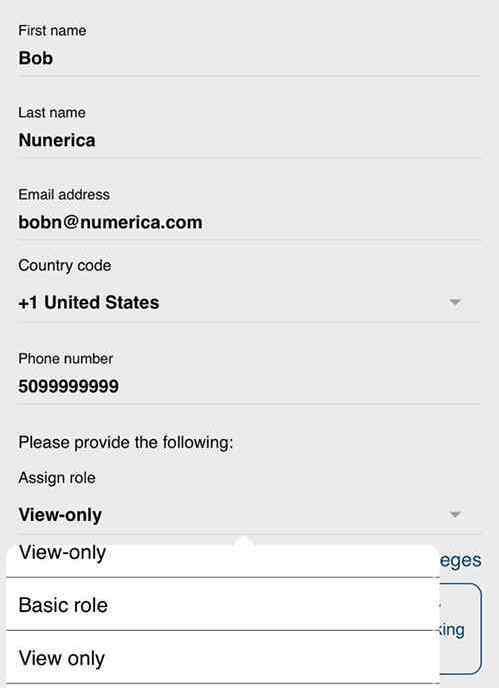
Select accounts the user will have access to. Tap Add User.

Log in and select More.
Click User management.
To the far right, select +Add a new user.
Select the Business and enter the user’s information.
Assign a role to the user.
Select accounts the user will have access to.

Click Add user.
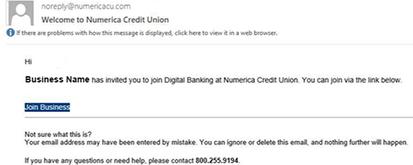
Note: A sub-user is sent an email invitation after being added by an account owner.
To launch the registration process, select Join Business from the email invitation.
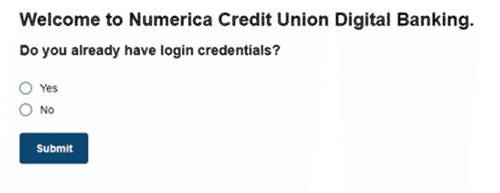
Do you already have login credentials, possibly from another Numerica account? If so, select Yes and log in to link your credentials to this business account. You're all set!
If not, select No. The next steps will create your Digital Banking account.
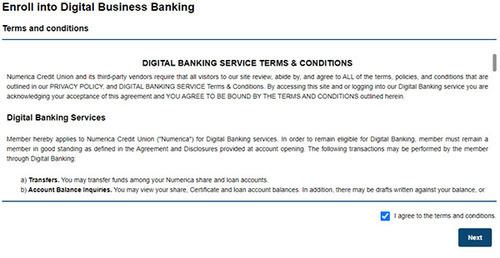
Review the terms and conditions. If they look good, check the box and click Next.
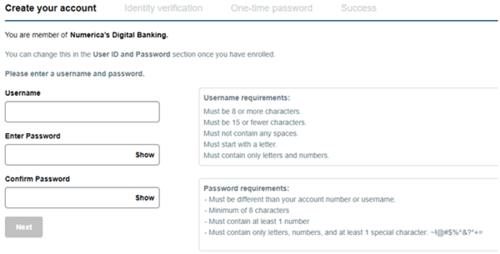
Set your username and password. Click Next.
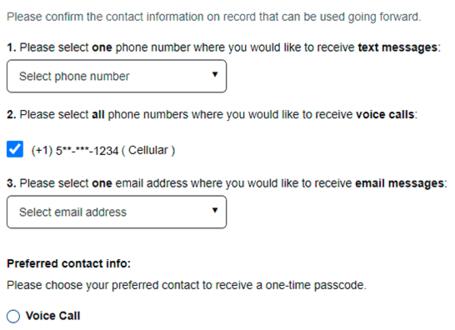
Select your best contact information for verification purposes.
Enter the verification passcode sent to your phone AND the one sent to your email. That’s it. You’ve joined the business account as a sub-user.
Use the instructions below to remove — or add back — a membership from your view when you log in to Online Banking or the Mobile App. (For instance, you prefer to only use Online Banking for a business account membership and don’t want your individual membership information displayed.)
To connect your Numerica digital account to your Quicken, QuickBooks, or Mint money management software, review the instructions in the corresponding link below.
Message and data rates may apply. Airtime, roaming, data usage, and minutes of use may be billed by your mobile provider. See carrier for specific rates and terms.